Get Query ID (Activity Flex Query ID)
The Query ID is a unique identifier that tells the IBKR system exactly which data points to retrieve—such as trades, cash transactions, or account balances—via the Flex Web Service.
1. Log in to the Client Portal:
Start by logging into your Interactive Brokers Client Portal.
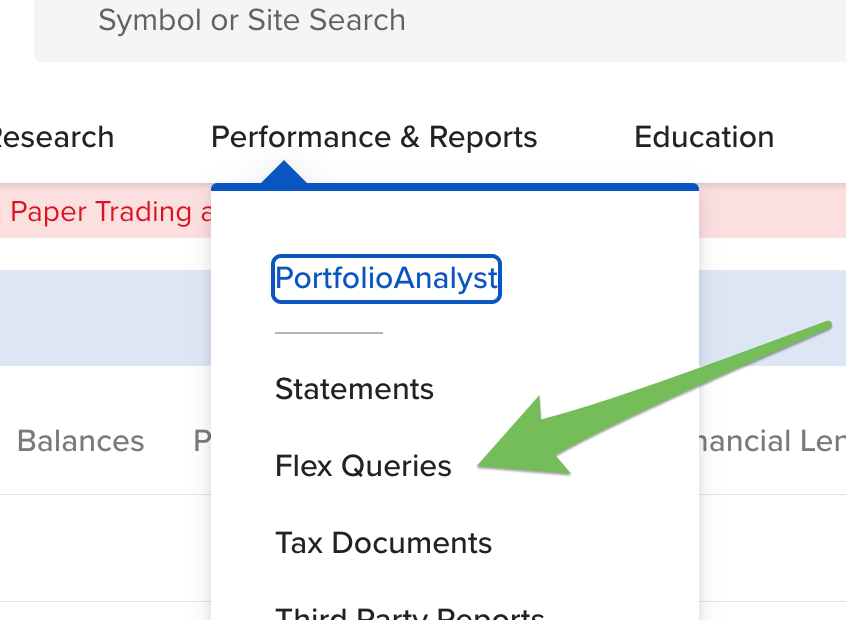
2. Navigate to Flex Queries:
Go to the main menu and select "Performance & Reports" > "Flex Queries".
3. Add a Flex Query:
Click the plus "+" icon located next to Activity Flex Query.
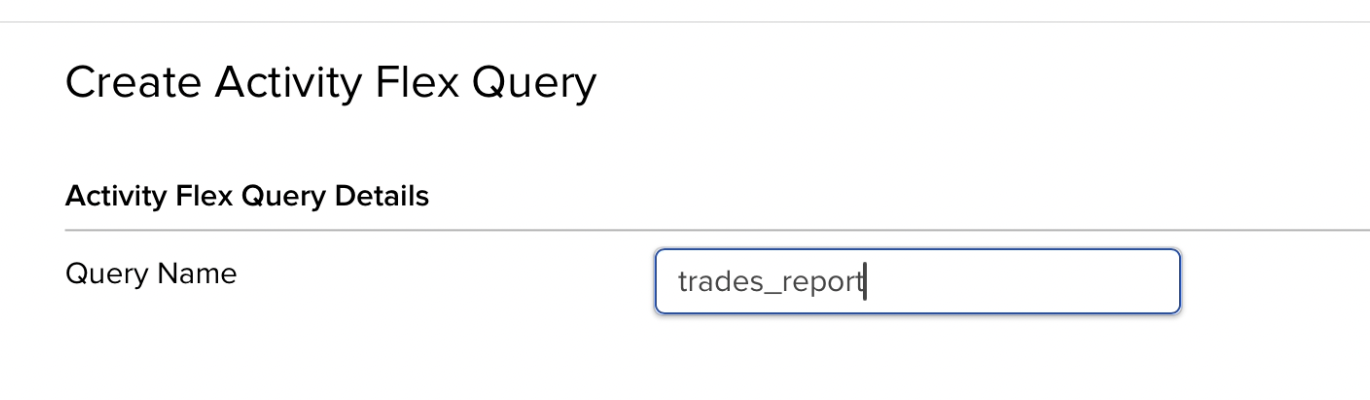
4. Create "Activity Flex Query":
In this step, you will define exactly what data Interactive Brokers sends to our service. Please note that the configuration requirements differ depending on whether you are using a Sync Plan or the Add-On.
General Setup Query Name: Enter a recognizable name (e.g., T2S_Daily_Sync or T2S_Addon_Data).
This is the most critical step in the setup process. How you configure this query determines exactly what data "Trades to Sheets" can process:
A. Sections (Data Selection)
The Sections area defines what type of data IBKR will export.
- For Sync Plans:
The "One Section" Rule: We generally advise selecting only one section per Sync Plan (e.g., just "Trades" or just "Open Positions").
Sync Plan's Template: If you are using a "Trades to Sheets" template, you must match the report type to the template's needs. For example, our Portfolio Performance Dashboard requires the "Open Positions" report. Check the specific requirements for each template before selecting fields.
Custom Sheets: If you are building your own spreadsheet, feel free to choose any reports and fields; our system will sync the data accordingly. - For the Add-On: The Add-On has specific requirements to power its custom functions.
Currently, the Add-On need the following reports:
Open Positions; levelOfDetail: Details and Summary
| Sections | Sync Plan | Google Sheets Add-On |
|---|---|---|
| Reports | Depends on which report you would like to sync, but choose one report per sync plan. | Support Multiples, Not suggest to add "Trades". Report: "Open Positions" is suggested, level of Detail: Details and Summary |
| Fields | Depends on your needs | Depends on your needs |
| Use Case | Bulk data & Journaling | Lightweight snapshot data |
B. Delivery Configuration
You need to create two separate queries: one for your Sync Plan and one for your Add-On. This ensures you only share the specific data needed for each feature.
| Delivery Configuration | Sync Plan | Google Sheets Add-On |
|---|---|---|
| Format | CSV | XML |
| Include Headers | Yes | Not Applicable |
| Period | Last 365 Days (or custom) |
Last Business Day |
For all other delivery settings, we suggest staying with the Default values.
C. General Configuration
To ensure our system can read the timestamps correctly, please verify that the General Configuration matches these defaults:
- Date Format:
yyyyMMdd - Time Format:
HHmmss - Date/Time Separator:
;(semi-colon)
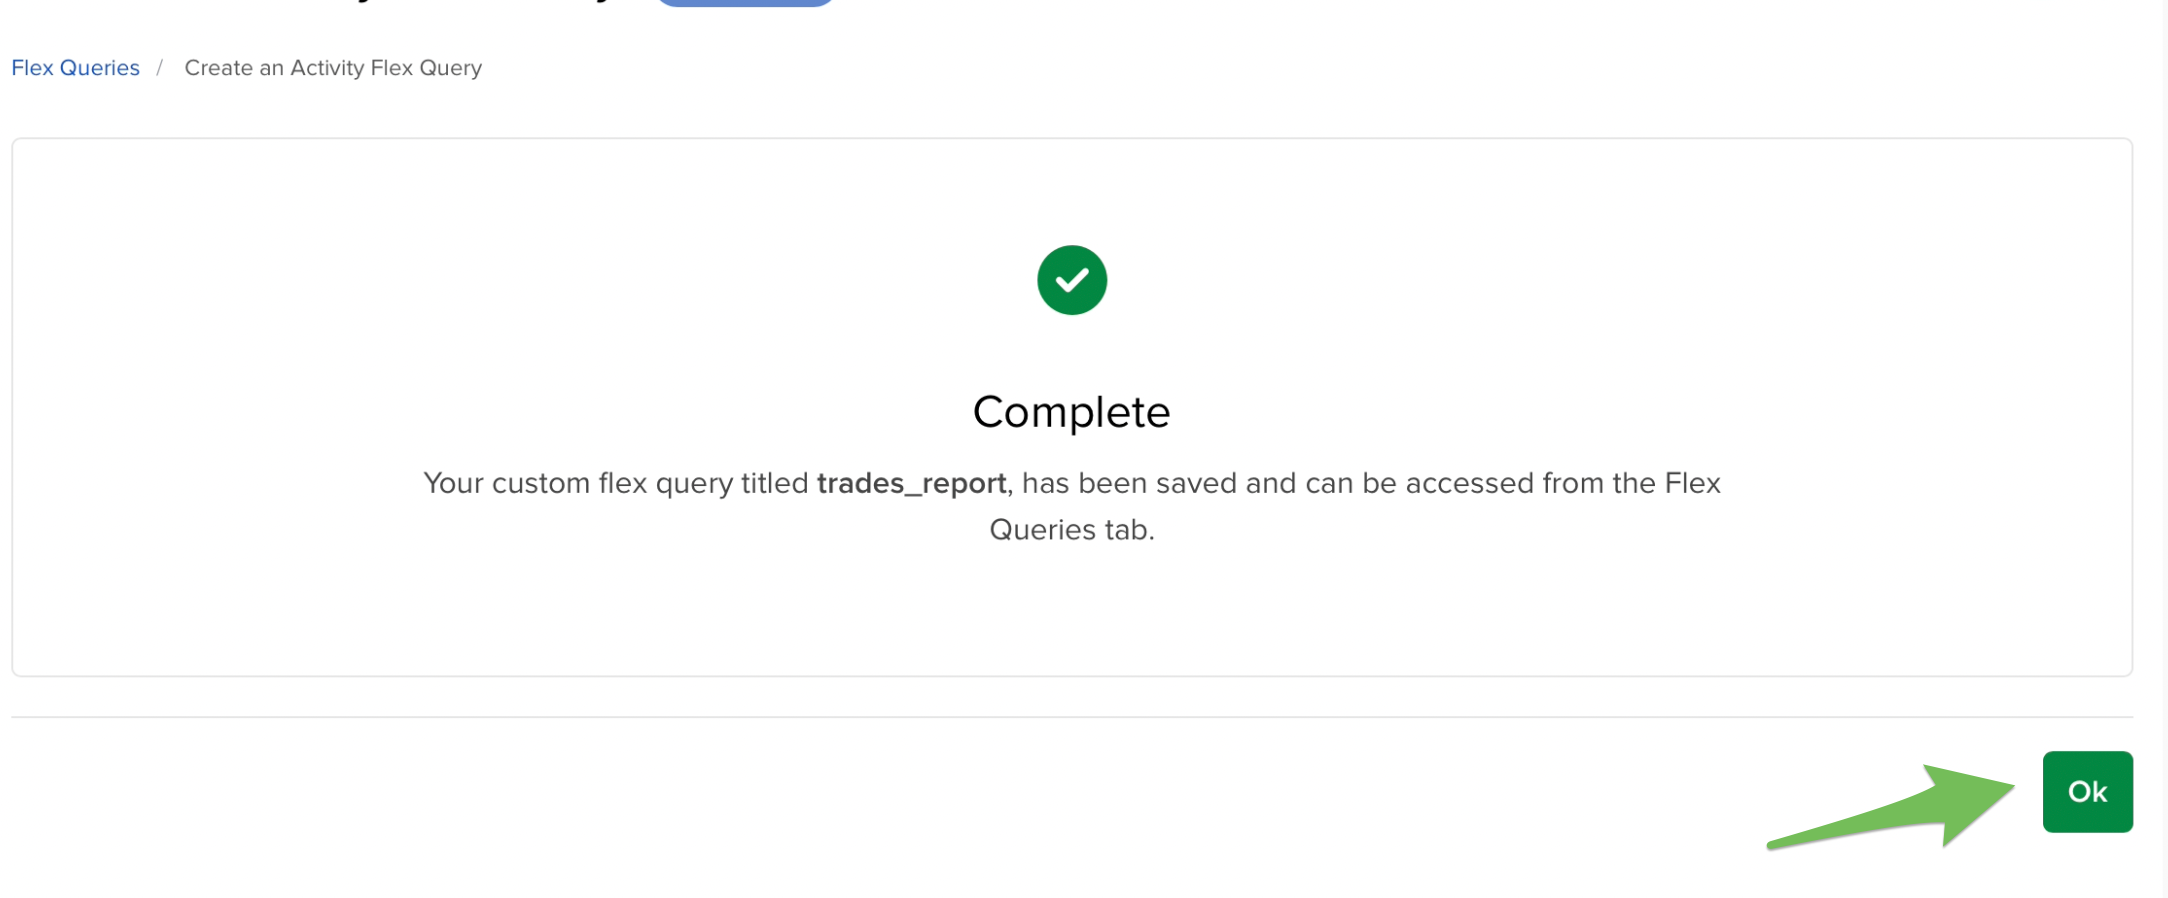
5. Locate the Created Query:
You should able to see the complete page, click "Ok" to finish.
You will return to the main Flex Queries page. Your new report will now be listed under the "Activity Flex Query" section.
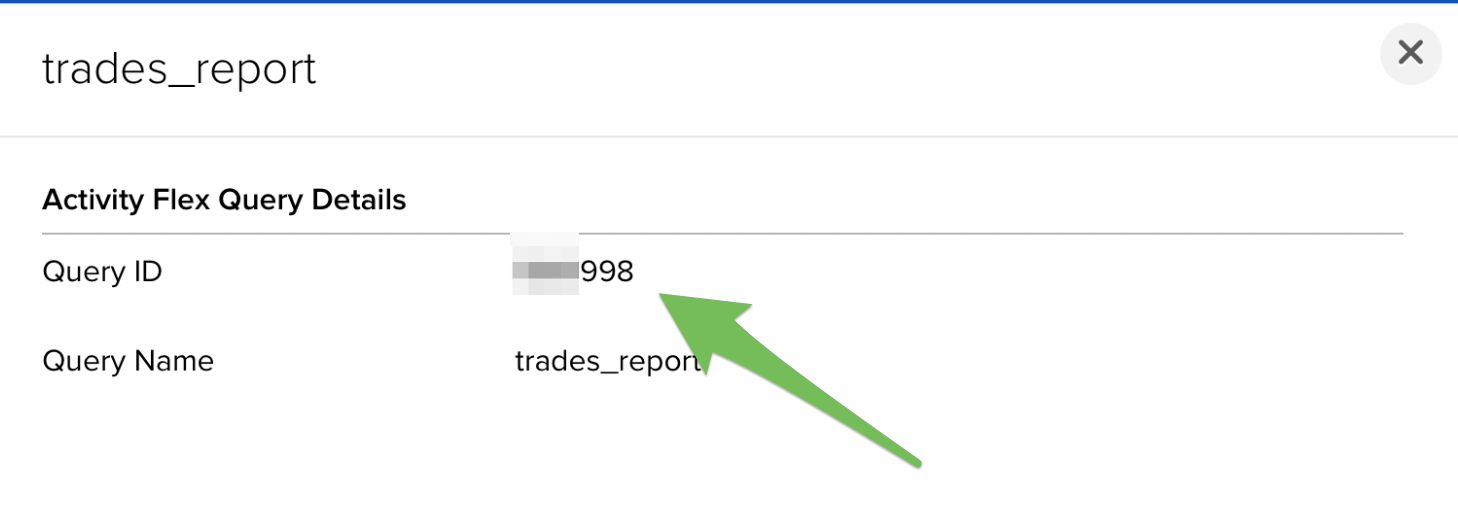
6. Retrieve the "Query ID":
Click the information ("i" icon) icon located to the left of your query's name.
A pop-up will appear. Copy the "Query ID" number displayed at the top.